Changing brakes on 2000 Chrysler Neon 2.0 litre model.
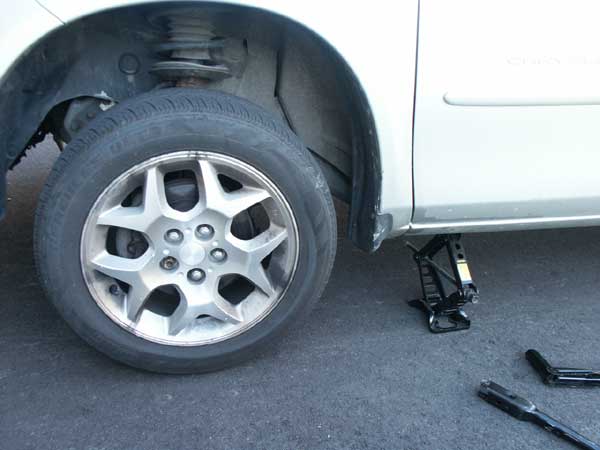
We start off by loosening the wheels lug nuts. This can be pretty hard to do if the wheel was previously tightened by air gun at your local mechanic’s shop or simply if it has not been touched in a long time. That’s why we had to use this metal pipe extension to give me more leverage. We loosen the lug nuts a bit (about 1/4 of rotation) before the car is jacked up and we’ll do the rest once the car has been raised. (picture 1)
Before lifting any vehicle make sure you read your manufacturer's instructions on how to safely use your jack.
We position our jack and carefully jack the car up, make sure that you do this on a level ground so the car doesn’t roll while it is up in the air. There is nothing worse than dropping the car of the jack. It is a good idea to block your other wheels to stop your car from any movement. Put an automatic transmission in "PARK" and manual transmission in reverse.
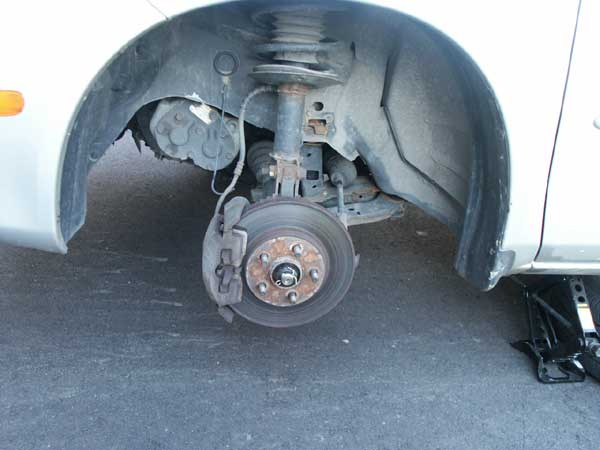
Now that the tire is off the pavement we remove all wheel lug nuts (which we loosened off previously) and remove the wheel. (picture 2)
So, here we are with the wheel taken off the car. (picture 3)
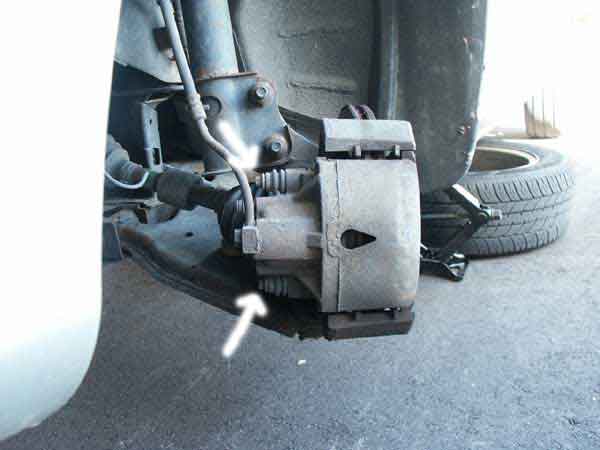
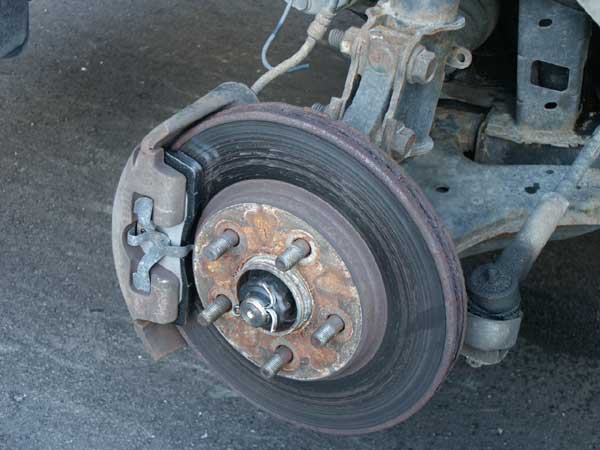
We have a first look at our brakes. Now is a good chance to inspect our brakes and check for any leaks etc. Inspect your caliper, hoses and fittings. Here is a look at the brakes from the side. Although the break pad looks fairly good let’s wait and see what it looks like on the other side of the brake disc. We also inspect our break disc - run your finger across the disc and feel for any grooves. (picture 4)
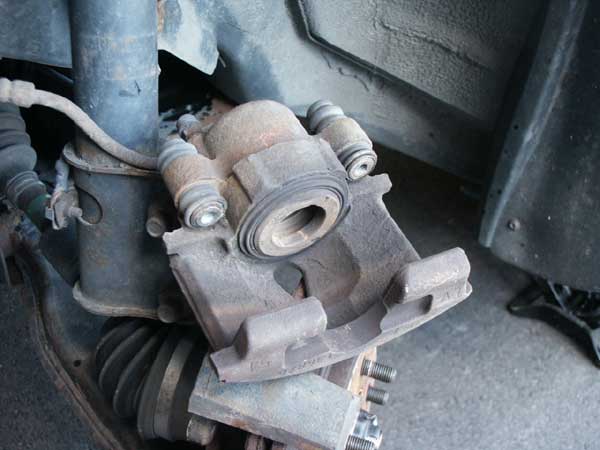
In this model of 2000 Chrysler Neon it looks like removing the cylinder will be a quite an easy task. brakes are held in place by 2 bolts indicated by the arrows (lower guide pins). These usually are 10-mm allen head or hex-head bolts. (picture 5)
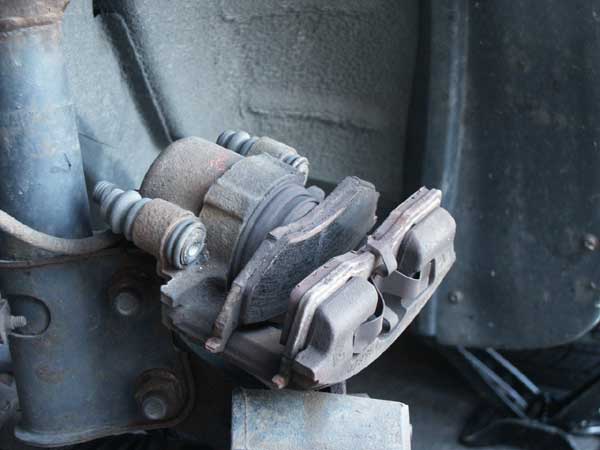
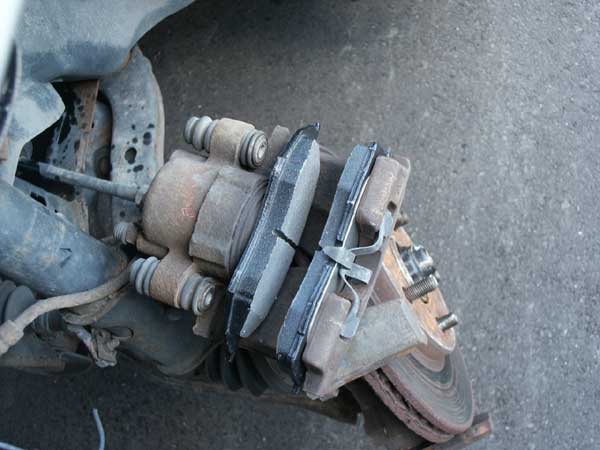
After taking the bolts off we position the cylinder on top of the disc brake. You must be careful as the whole unit can be fairly heavy and we do not want to damage brake line which is still connected to the unit. The reason why we did not remove the break line is so we would not have to bleed the brakes at the end of this task. We are now ready to remove old break pads. These are usually held in place by metal spring hinges and can be easily removed (snapped off). (picture 6)
Here's a look with the break pads off. Notice that the master cylinder has been already pushed back. This can be difficult if you don't have right tools. For this we used 18 inch c-clamp which was perfect for this job. Make sure to check fluid level in mastery cylinder, if it is full to the max make sure you remove some fluid before you push back the cylinder (you can use syringe to remove fluid - discard old break fluid and do not reuse it). (picture 7)
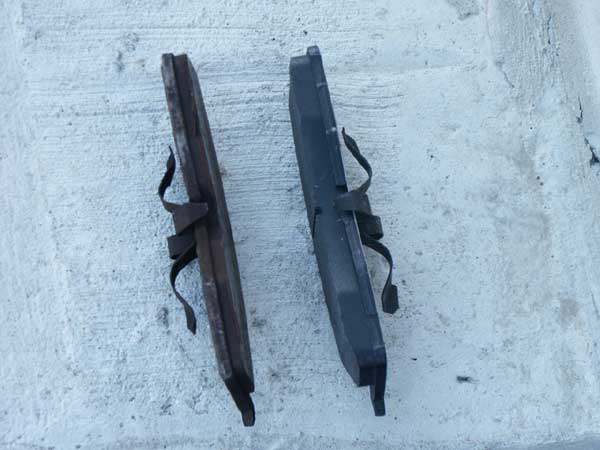
Here is a shot of the old and new brake pads. (picture 8)
Before you put new break pads on it is a good idea to dust off your unit and get rid off any unnecessary dirt. Clean and lubricate all contact points. Putting your break pads in place is fairly easily as usually they are snap on type. There are no bolts to hold them in place. (picture 9)
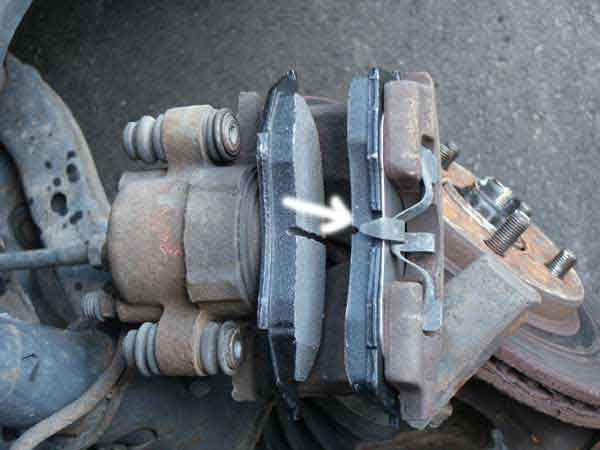
Did you ever wonder why your brakes squeak just before it's time to replace them? This is actually done on purpose to warn the driver and give you notice that your brakes are almost ready to be replaced. Manufacturer does this by extending thin piece of sheet metal (see photo) which will rub against your disc break before your break pad is completely used. (picture 10)
Break pads are put on and the unit has been reassembled. One downside to replacing your own brakes is that if your disc brake has been warn down it needs to be turned down at your local shop. Fortunately my break discs seemed to be in a fairly good shape and they did not need to be turned down. (picture 11)
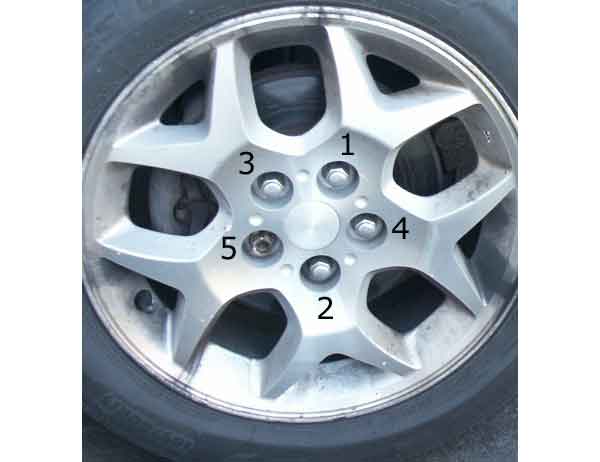
Now it's time to put the wheel back on. Is there a sequence in which the wheel's lug nuts should be tightened? Yes, please see the photo for sequence in which the lug nuts should be tightened (very important) Before driving the car after replacing brakes pump the brakes several times so the pads touch the rotors.. Check the level of your break fluid. If necessary add the fluid (or remove) so the level stays at max level. For first 200 km avoid heavy and quick breaking - this will mate the new pads to the surface of your rotors. (picture 12 and picture 13)
*Cdnauto.org takes no responsibilities for any injuries
that you may sustain while following the above instructions.
These instructions are simply for educational purposes only. If you
do not have basic mechanical skills you should not attempt practicing
this article and have a professional install your parts.

Picture
1
Picture 2
Picture 3

Picture 4
Picture 5
Picture 6
Picture 7
Picture 8
Picture 9
Picture 10
Picture 11
Picture 12
Picture 13
MORE FROM CDNAUTO

Canada gas tax breakdown per province - Each litre of gas you're buying, how much of that amount is going to your government? View breakdown across all provinces.
High gas prices? Think again. - So you think you're paying too much for gas?. Take a look at pricing of gas around the world and see how Canada stacks up against other countries.

With gas prices surpassing $1 dollar mark we take a look at other fuel
alternatives. Hybrid vehicles, CNG, Propane and other alternatives.
Read our article on propane
and natural gas

Diesel engine technology has been around for quite some time now. See list of Diesel vehicles that are currently available to you.